
Gas sensor interface with Arduino

Project name :-Gas Sensor interface with Arduino 


Component Required :
1> Gas sensor (MQ-2)
2> Led
3> Arduino
4> Jumper wires
5> PC

Project Objectives :

  • To design the Automation system to detect the gas.
  • To be able to aware human being from harmful gas


CIRCUIT DIAGRAM


fig:-Circuit Diagram

Connect analog pin of sensor to A0 of Arduino.
Connect GND pin of sensor to GND of Arduino
Connect VCC pin of sensor to 5V of   Arduino
CODE
int led = 13;
int sensor = A0;
void setup()
 {
      pinMode(led, OUTPUT);//Led is use as output.
      pinMode(sensor, INPUT);//sensor is use as input.
     Serial.begin(9600);
}
void loop()
{
    int value = analogRead(sensor);//read the value of analog sensor
    Serial.print("sensor value: ");
    Serial.println(value);//print the value of sensor on serial monitor
if (analogSensor > 400)
{
    digitalWrite(led, HIGH);
 }
 else
{
    digitalWrite(led, LOW);
}
  delay(100);
}

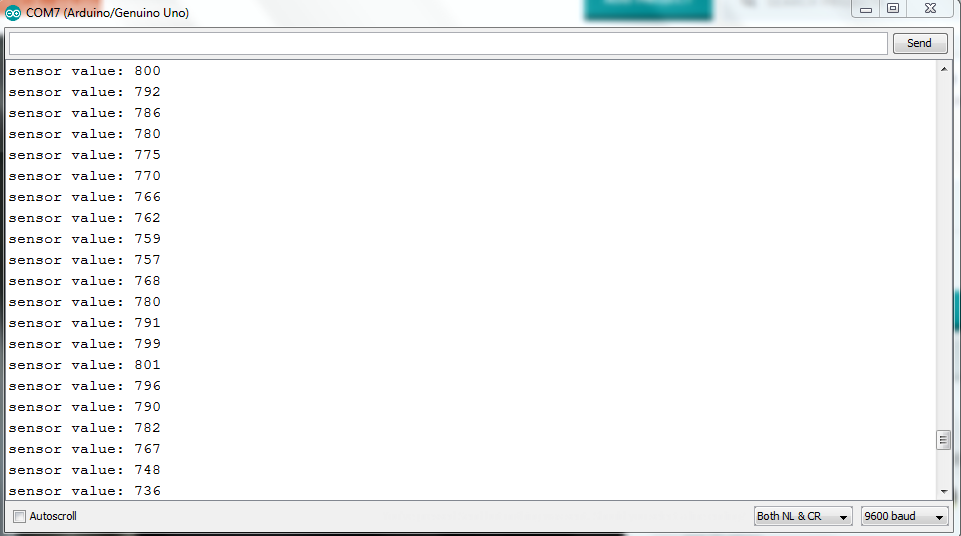
Upload the code &open the Serial monitor

When the sensor doesn't detected smoke then it gives value less than 400 so the led doesn't Glow.


When sensor detect smoke, it gives the value greater than 400 so the led will Glow
Comments

Popular posts from this blog

warm clothes distribution program

‘ Small step can make a big difference ’ Rural Women Development Centre from morang,Nepal distributed the warm clothes to the needy people. They manage it possible by collecting fund from working staffs and management committe. Here is the video link of the distribution program. https://youtu.be/AxaHbivcQUM

Multiple mcp23017 interfacing with Arduino

MCP23017 is the I/O port extender that runs on 12C. It is 16-bit I/O expender.in this tutorial we are going to interface the single and multiple  mcp23017 with arduino.  fig:- mcp32017 module IT has 16 I/O ports from PA0 to PA7 and PB0 to PB7. first of all we are going to interface the single mcp23017 with Arduino. For this  connect the circuit as shown on figure. Download the library for mcp23017  from  sketch-- include library -- manage libraries.

Classic Snake Game on Pi Pico with Pico Display: A Complete DIY Guide

  Introduction to Raspberry Pi Pico Gaming The Raspberry Pi Pico, built around the RP2040 microcontroller, has revolutionized DIY electronics projects with its affordability and versatility. When combined with the Pico Display pack, it becomes a perfect platform for retro gaming projects. In this comprehensive guide, we’ll walk through creating the classic Snake game using MicroPython, demonstrating how to leverage the Pico’s capabilities for interactive gaming applications.